


Campo oscuro
Darkfield
Quella del campo oscuro è una tecnica che permette la visione del campione o particolari di esso, come luminosi su uno sfondo oscuro ( fig.2).
Ciò avviene perché i raggi di luce anzicchè attraversare il campione lo investono lateralmente e a 360°, per cui nel tubo del microscopio entreranno solo i raggi diffratti dal campione.
Esso si realizza mediante particolari condensatori di luce che comunque sono molto costosi, ma qui mostrerò una scorciatoia economica che funziona bene con obbiettivi di bassa e media potenza.
*****
Dark field is a technique that allows your samples or particular of it, on a dark background (fig. 2).
This because the beams of light reach the sample on sideways to 360°, therefore in the tube of the microscope will enter only the rays diffracted from the sample.
It realizes through particular condensers of light and they are very expensive, but here I will show an economic way to get good darkfield with of little or medium magnification objectives.
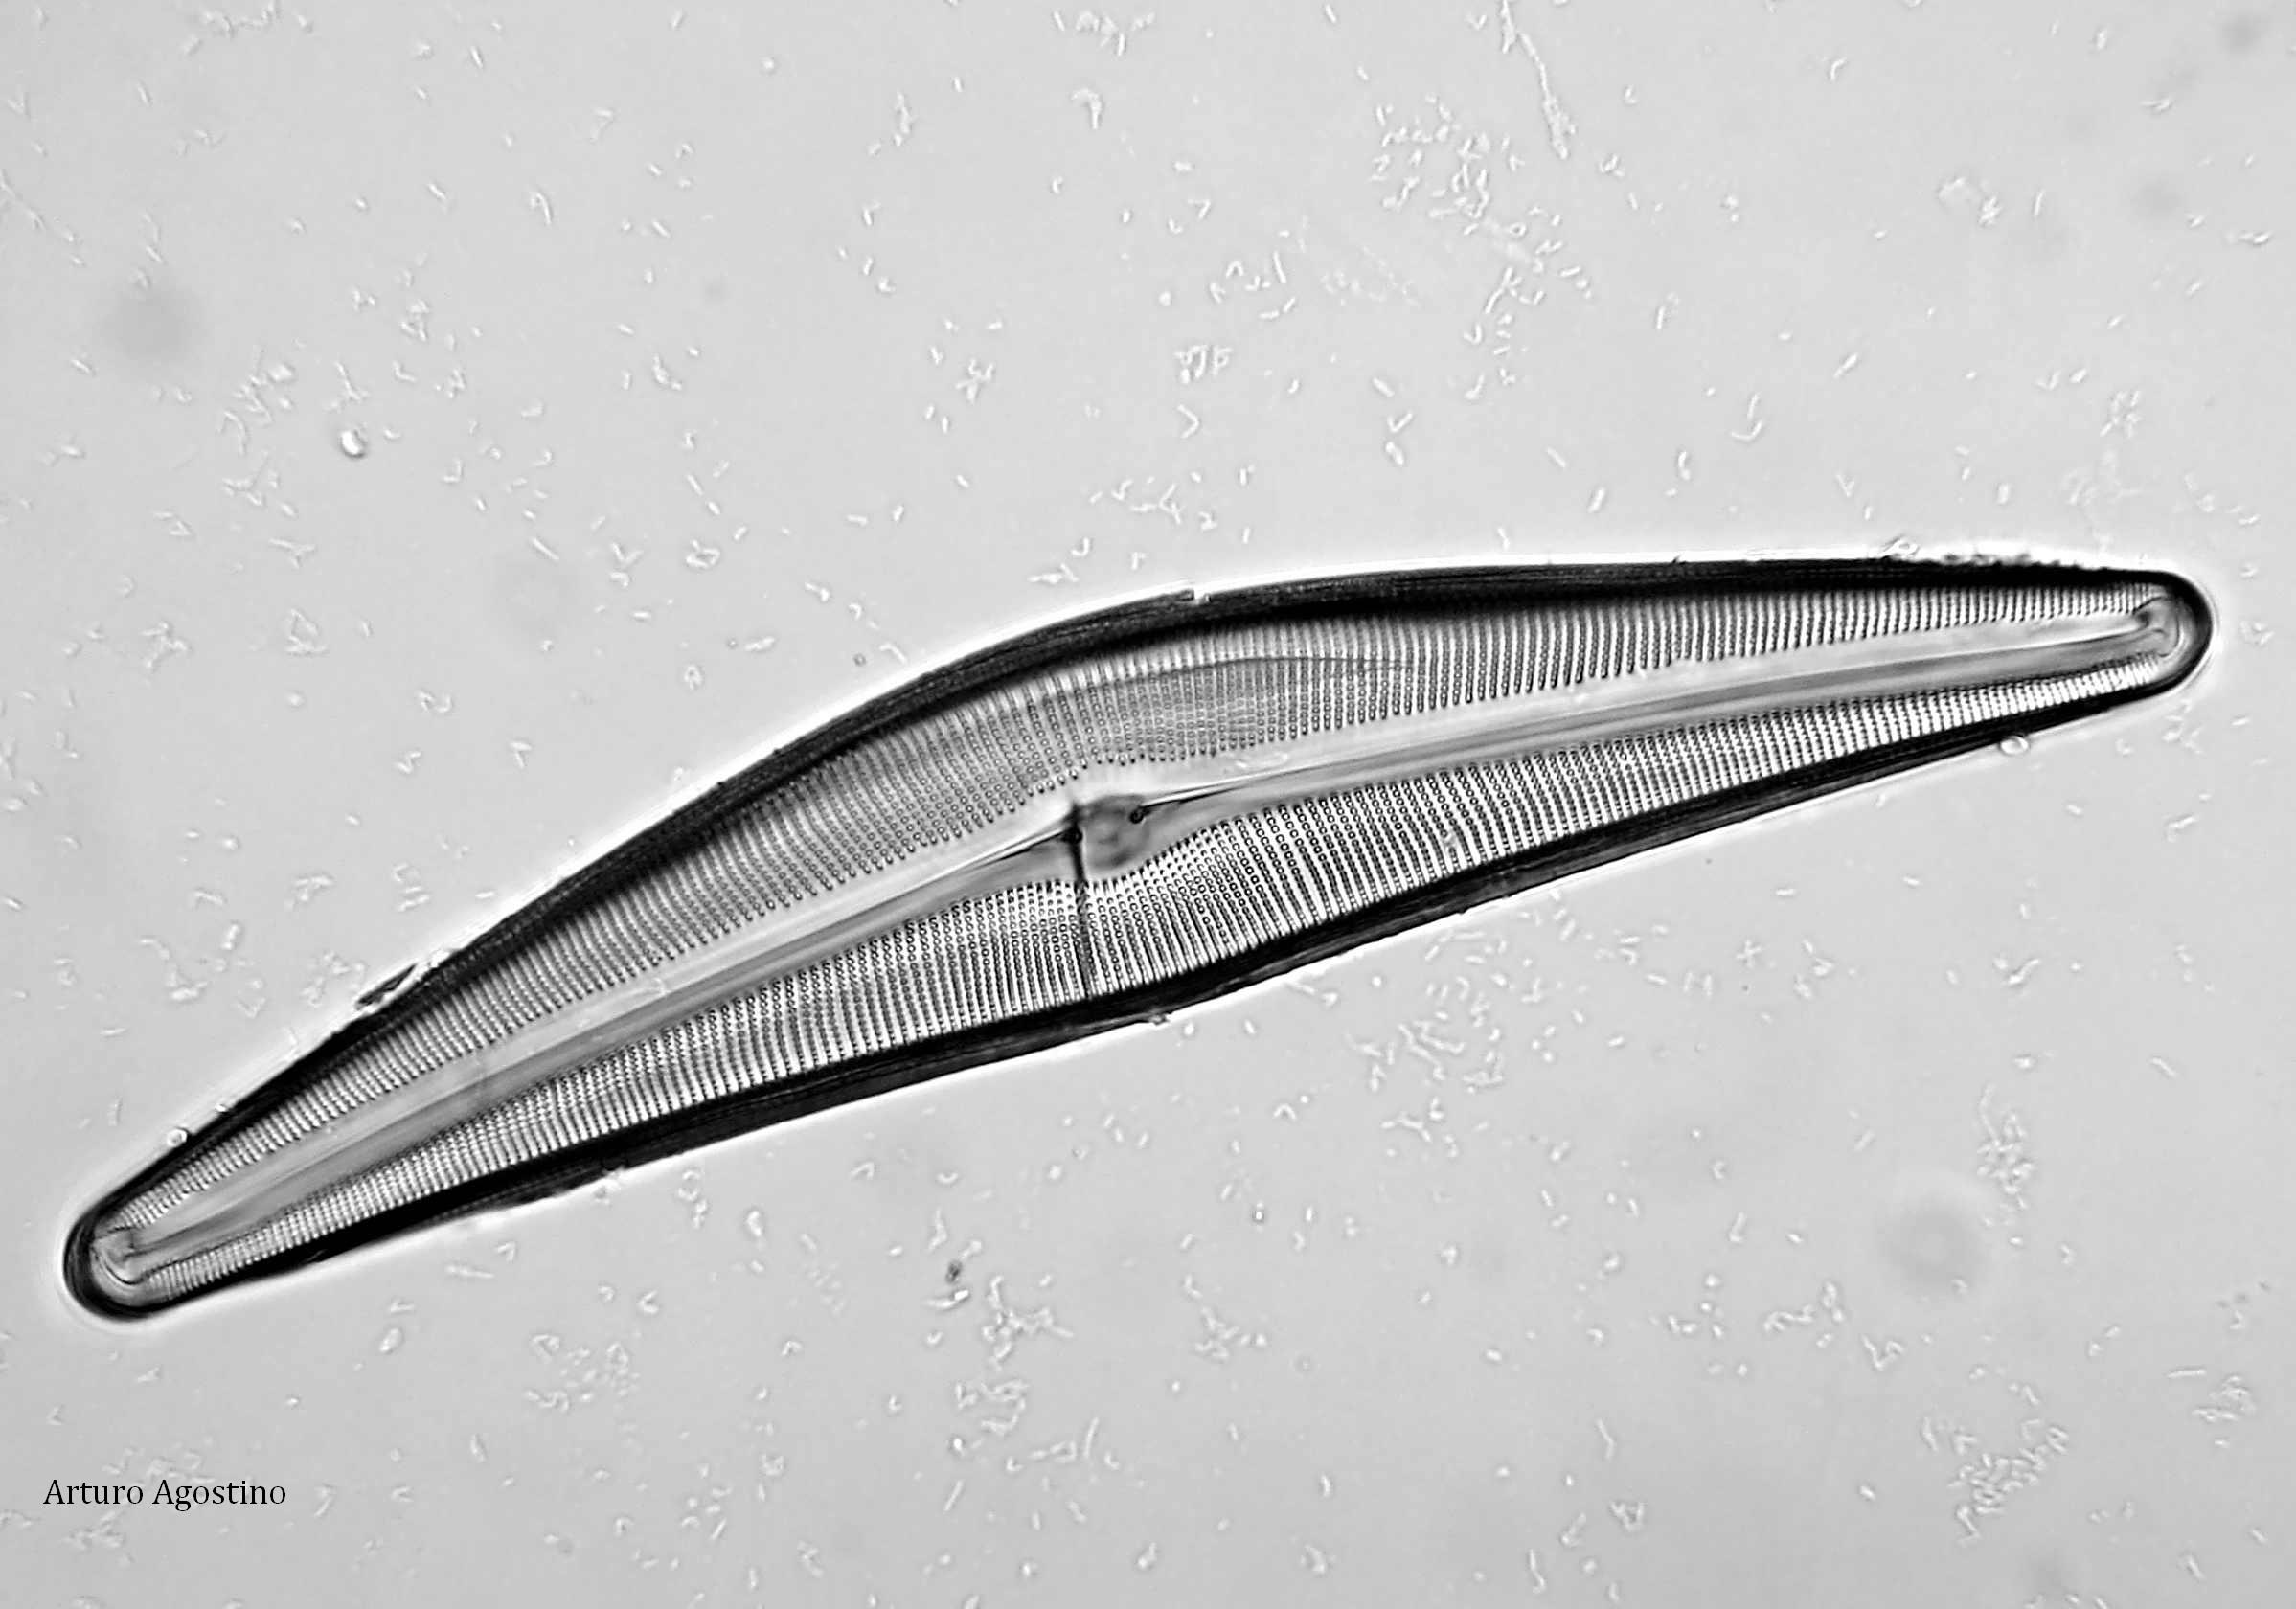
Fig.1: Cymbella aspera c.chiaro 250x
Cymbella aspera brightfield
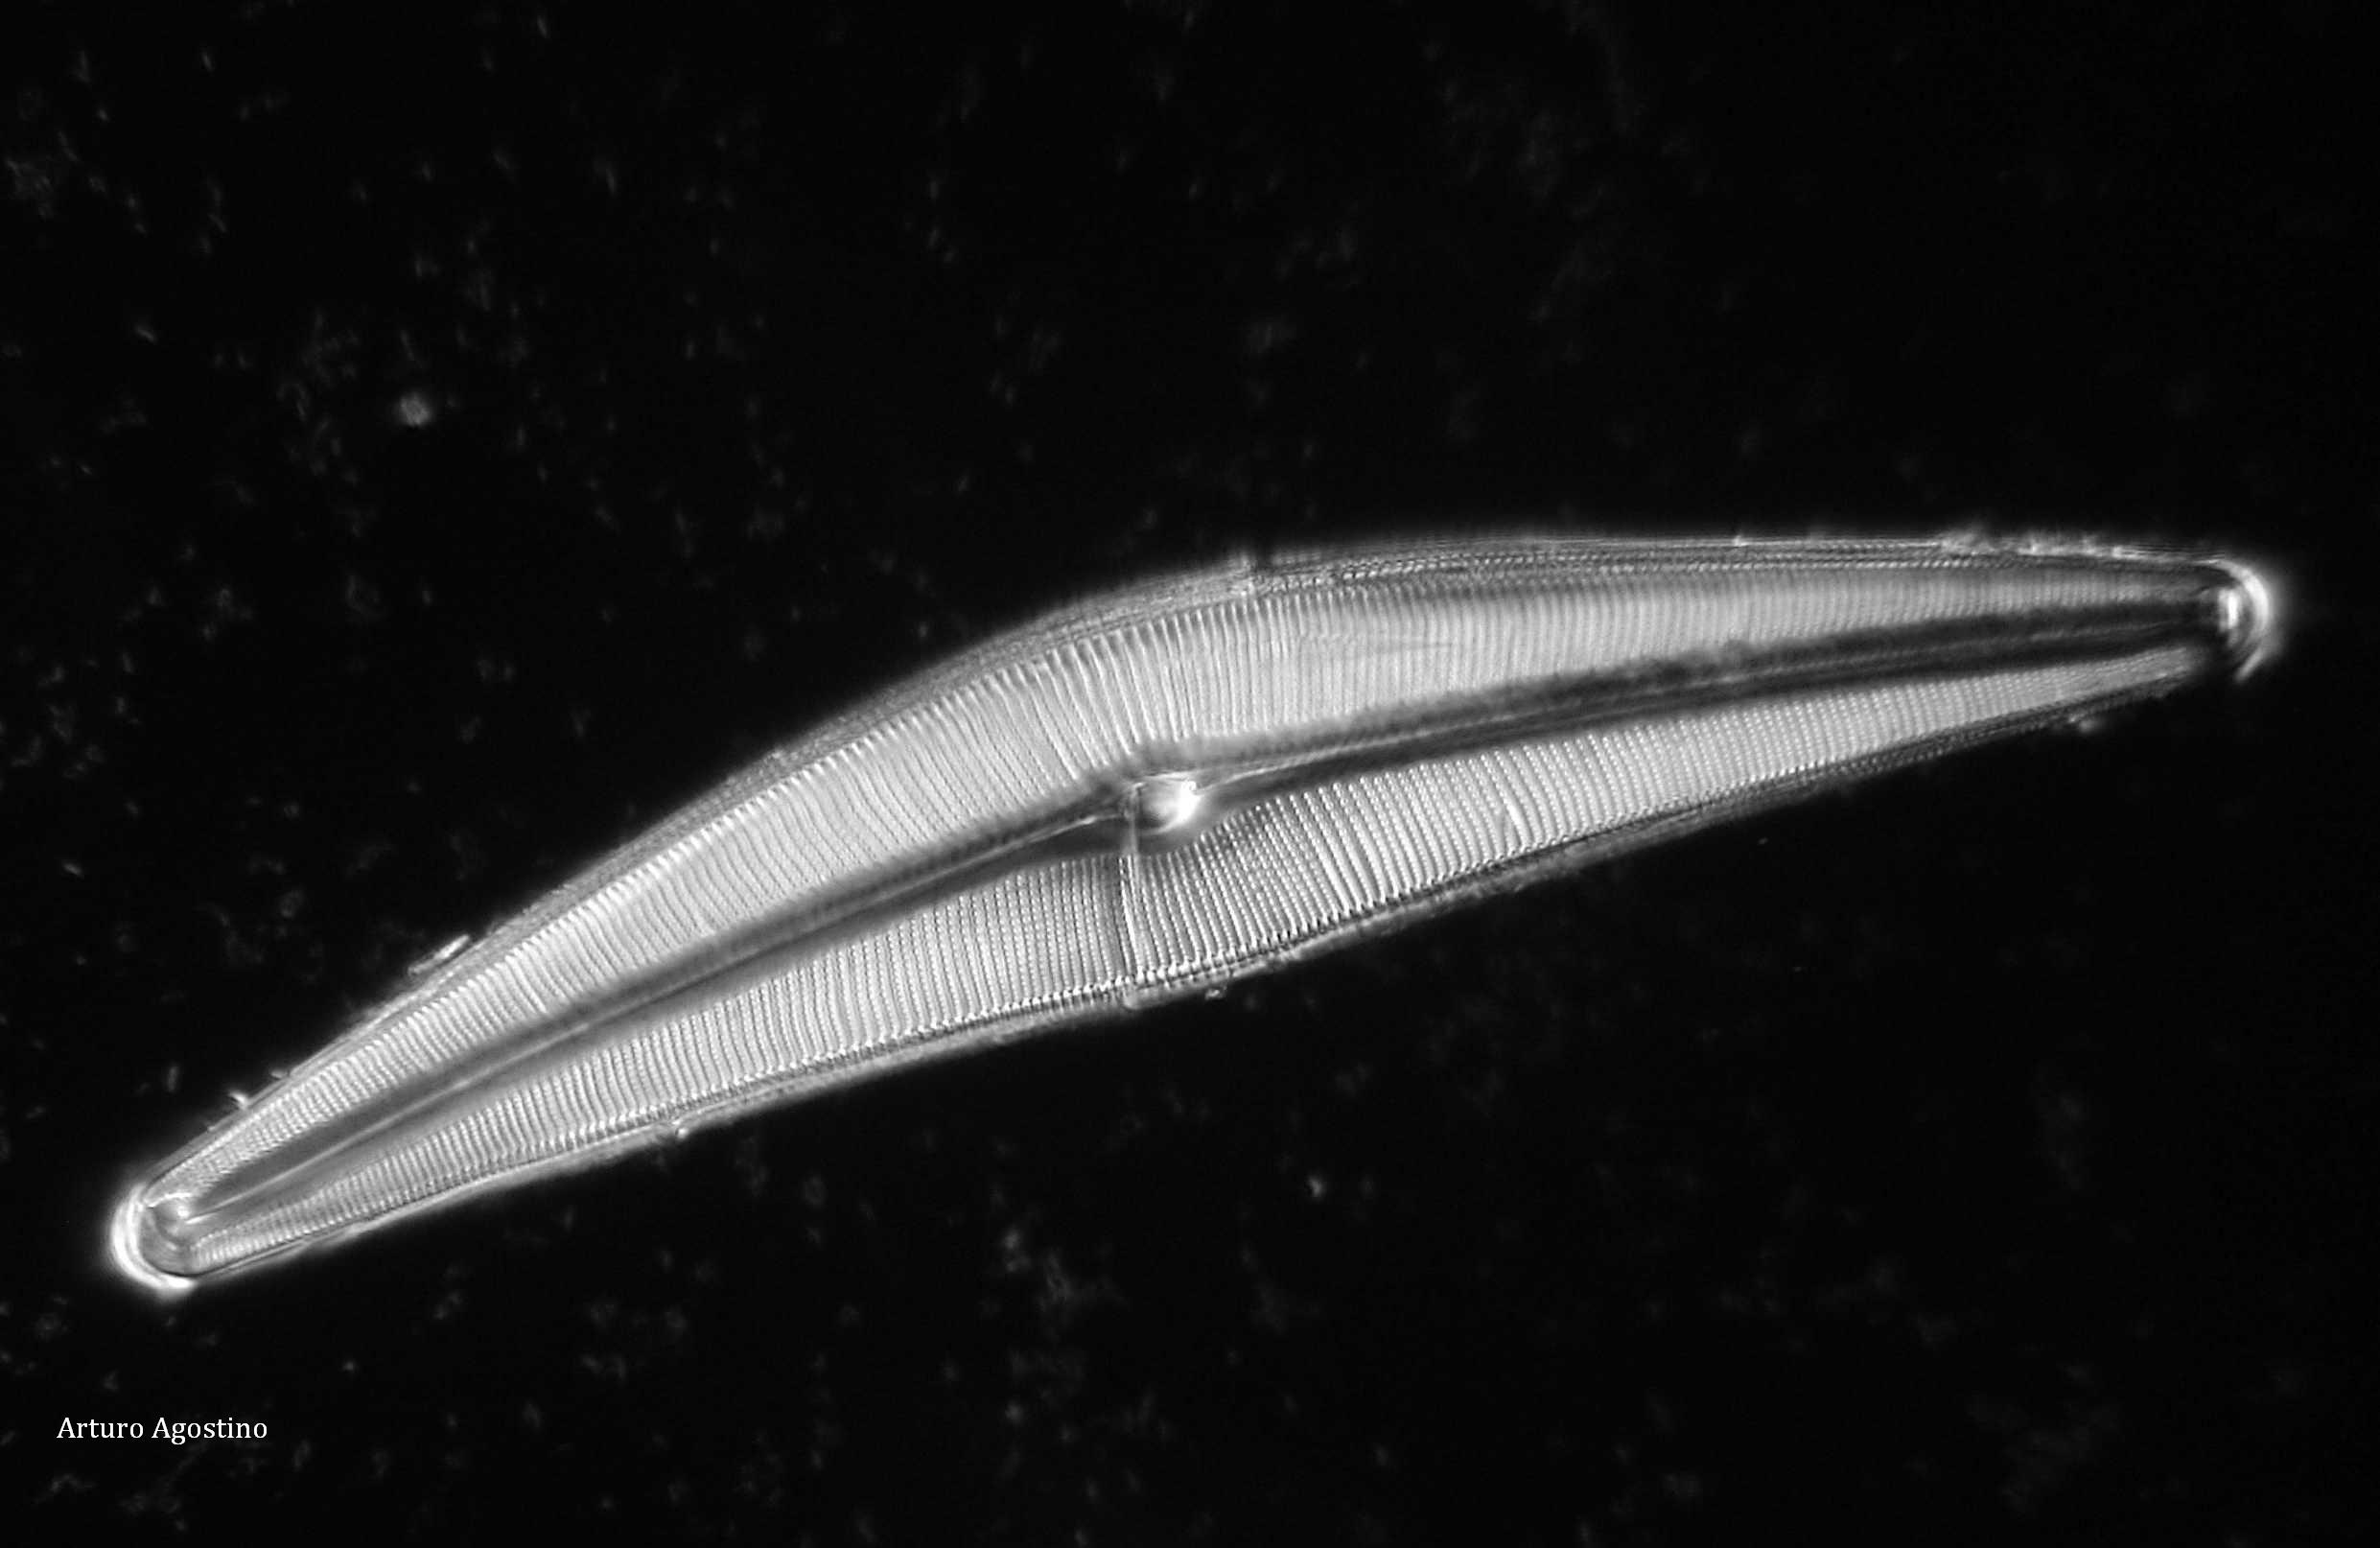
Fig.2: Cymbella aspera c.oscuro 250x
Cymbella aspera darkfield
Un semplice filtro
A simple filter
Tutto quello di cui abbiamo bisogno, è una striscetta di cartoncino diciamo 5cm x 3cm e un compasso con doppia punta.
Le dimensioni del disco vanno cercate per tentativi e per ogni obbiettivo, ma c’è un metodo ,seppur approssimativo, per calcolarle:
-ammettiamo di voler lavorare con un obbiettivo da 10x;
selezioniamolo ruotando la torretta, togliamo l’oculare e osserviamo all’interno del tubo, apriamo o chiudiamo il diaframma del condensatore (che deve essere alla sua massima altezza) fino a quando i suoi bordi non raggiungono i margini del campo visivo (sempre senza oculare);
a questo punto guardiamo il condensatore e prendiamo la misura dell’apertura lasciata dal diaframma (fig.3).
*****
what you need: a strip of cardboard of 5cm x 3cm and a compass with double point.
The dimensions of the disk must be looked for for attempts and for every objective, but there are a method, to calculate it.
we acknowledge to want to work with a 10x objective;
select it, remove the ocular and observe inside the empty tube, move the diaphragm of the condenser up to when it to sweep to the edges of the visual field (always without ocular);
then take a look to the condenser and take the measurement of the opening left by the iris diaphragm (fig.3).
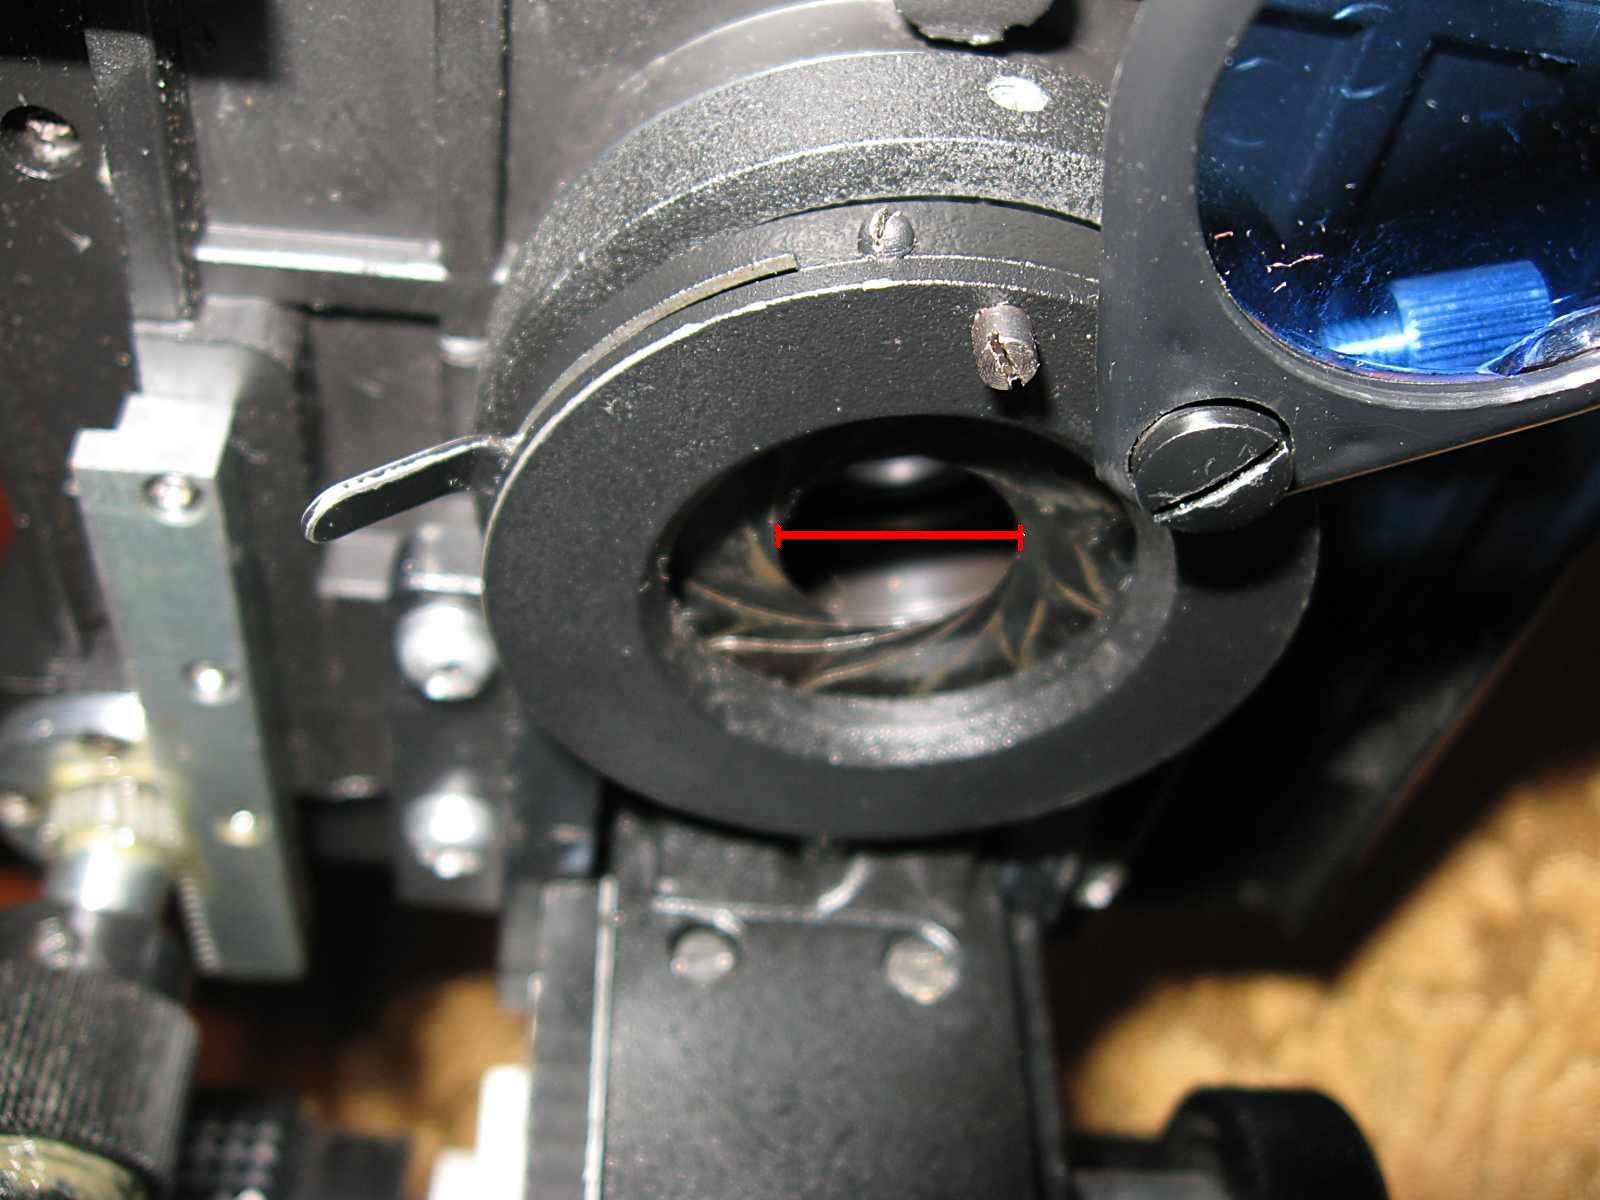
Fig.3 : apertura del diaframma del condensatore
Condenser diaphragm opening
Supponiamo che l’apertura sia di 20mm!
Prendiamo il compasso e apriamolo esattamente a metà del valore trovato (nel ns. caso 10mm), fissiamo la striscetta ad esempio su una tavoletta e dopo aver fissato il compasso come in fig 4 ruotiamo lentamente la striscetta fino a quando il dischetto non viene tagliato via.
Ritagliamo dall’altro lato un disco più grande di 3 o 4 mm e inseriamo in quest’ultima apertura il primo dischetto e fissiamo il tutto con nastro adesivo; avremo cosi qualcosa di simile alla fig.5
*****
Now suppose that the opening is 20mm!
take the compass and open it exactly to half the found value (in the ns. case 10mm), fix the strip on a tablet and after having fixed the compass as in fig 4 we slowly rotate the strip up to when the little disc doesn’t come cut away.
We cut out from the other side a greater disc of 3 or 4 mm and insert in this hole the first disc; we will have something similar to the fig.5
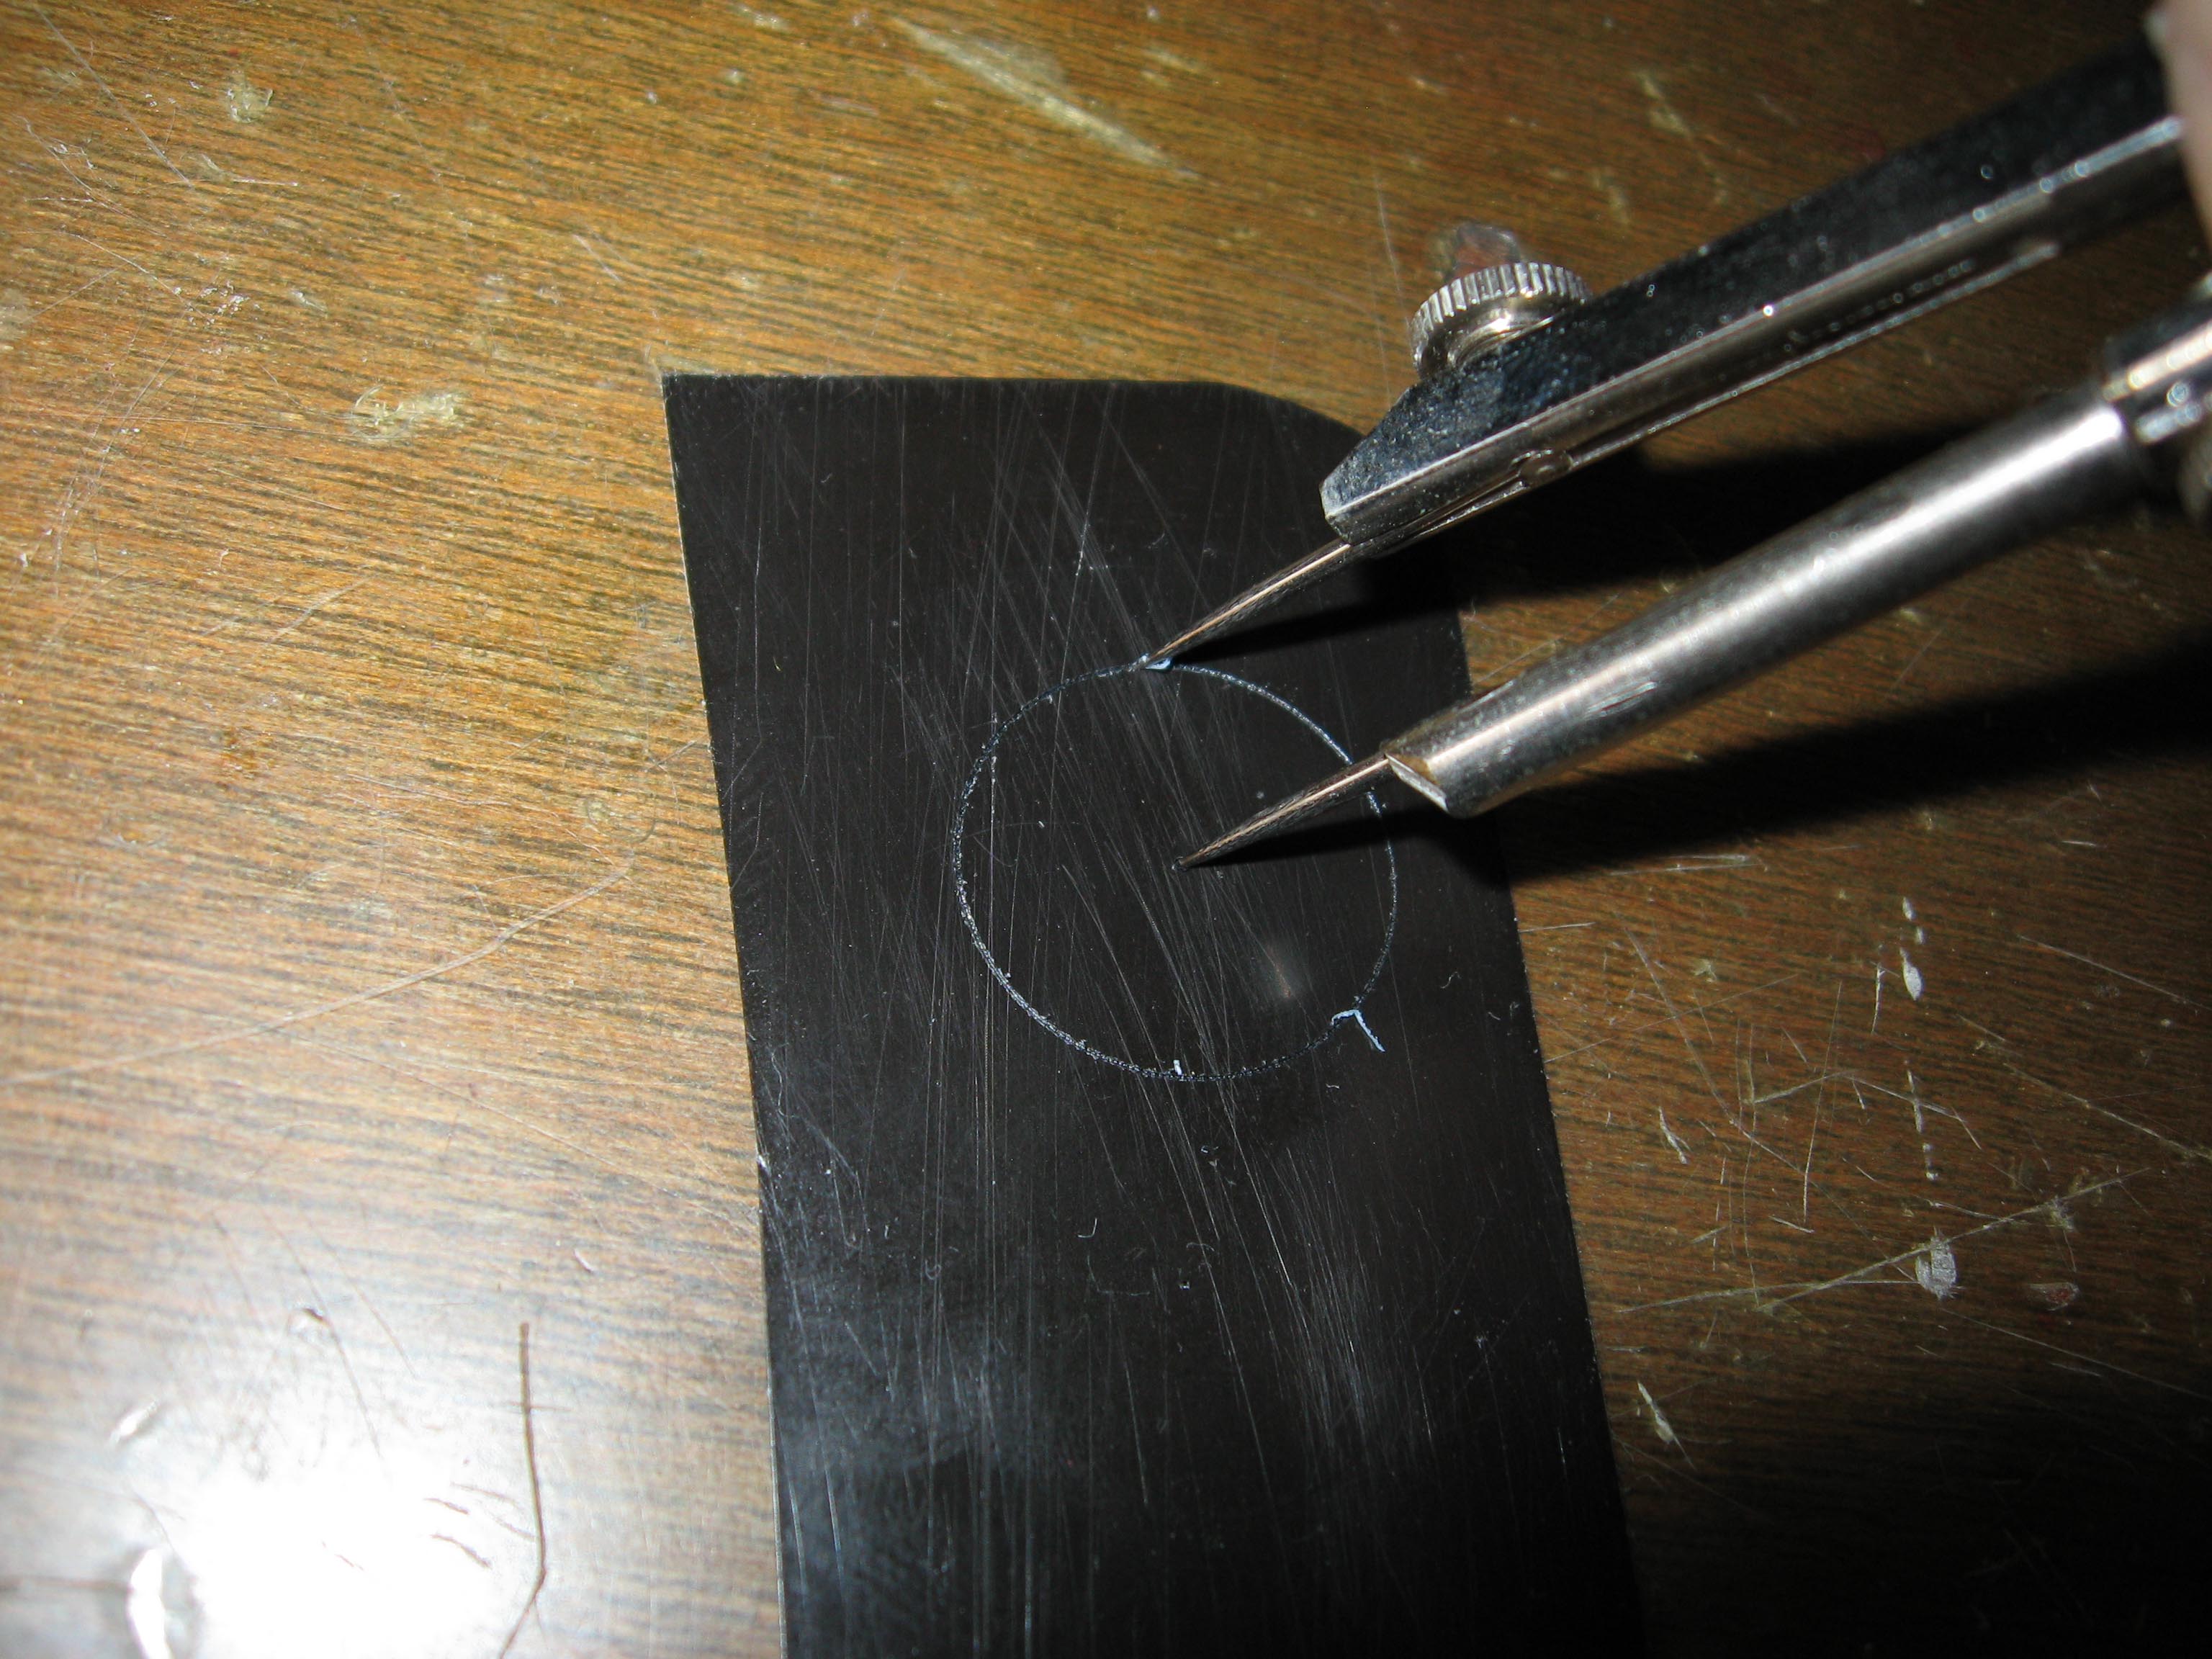
Fig.4: posizione del compasso sulla striscia
Compass on the strip
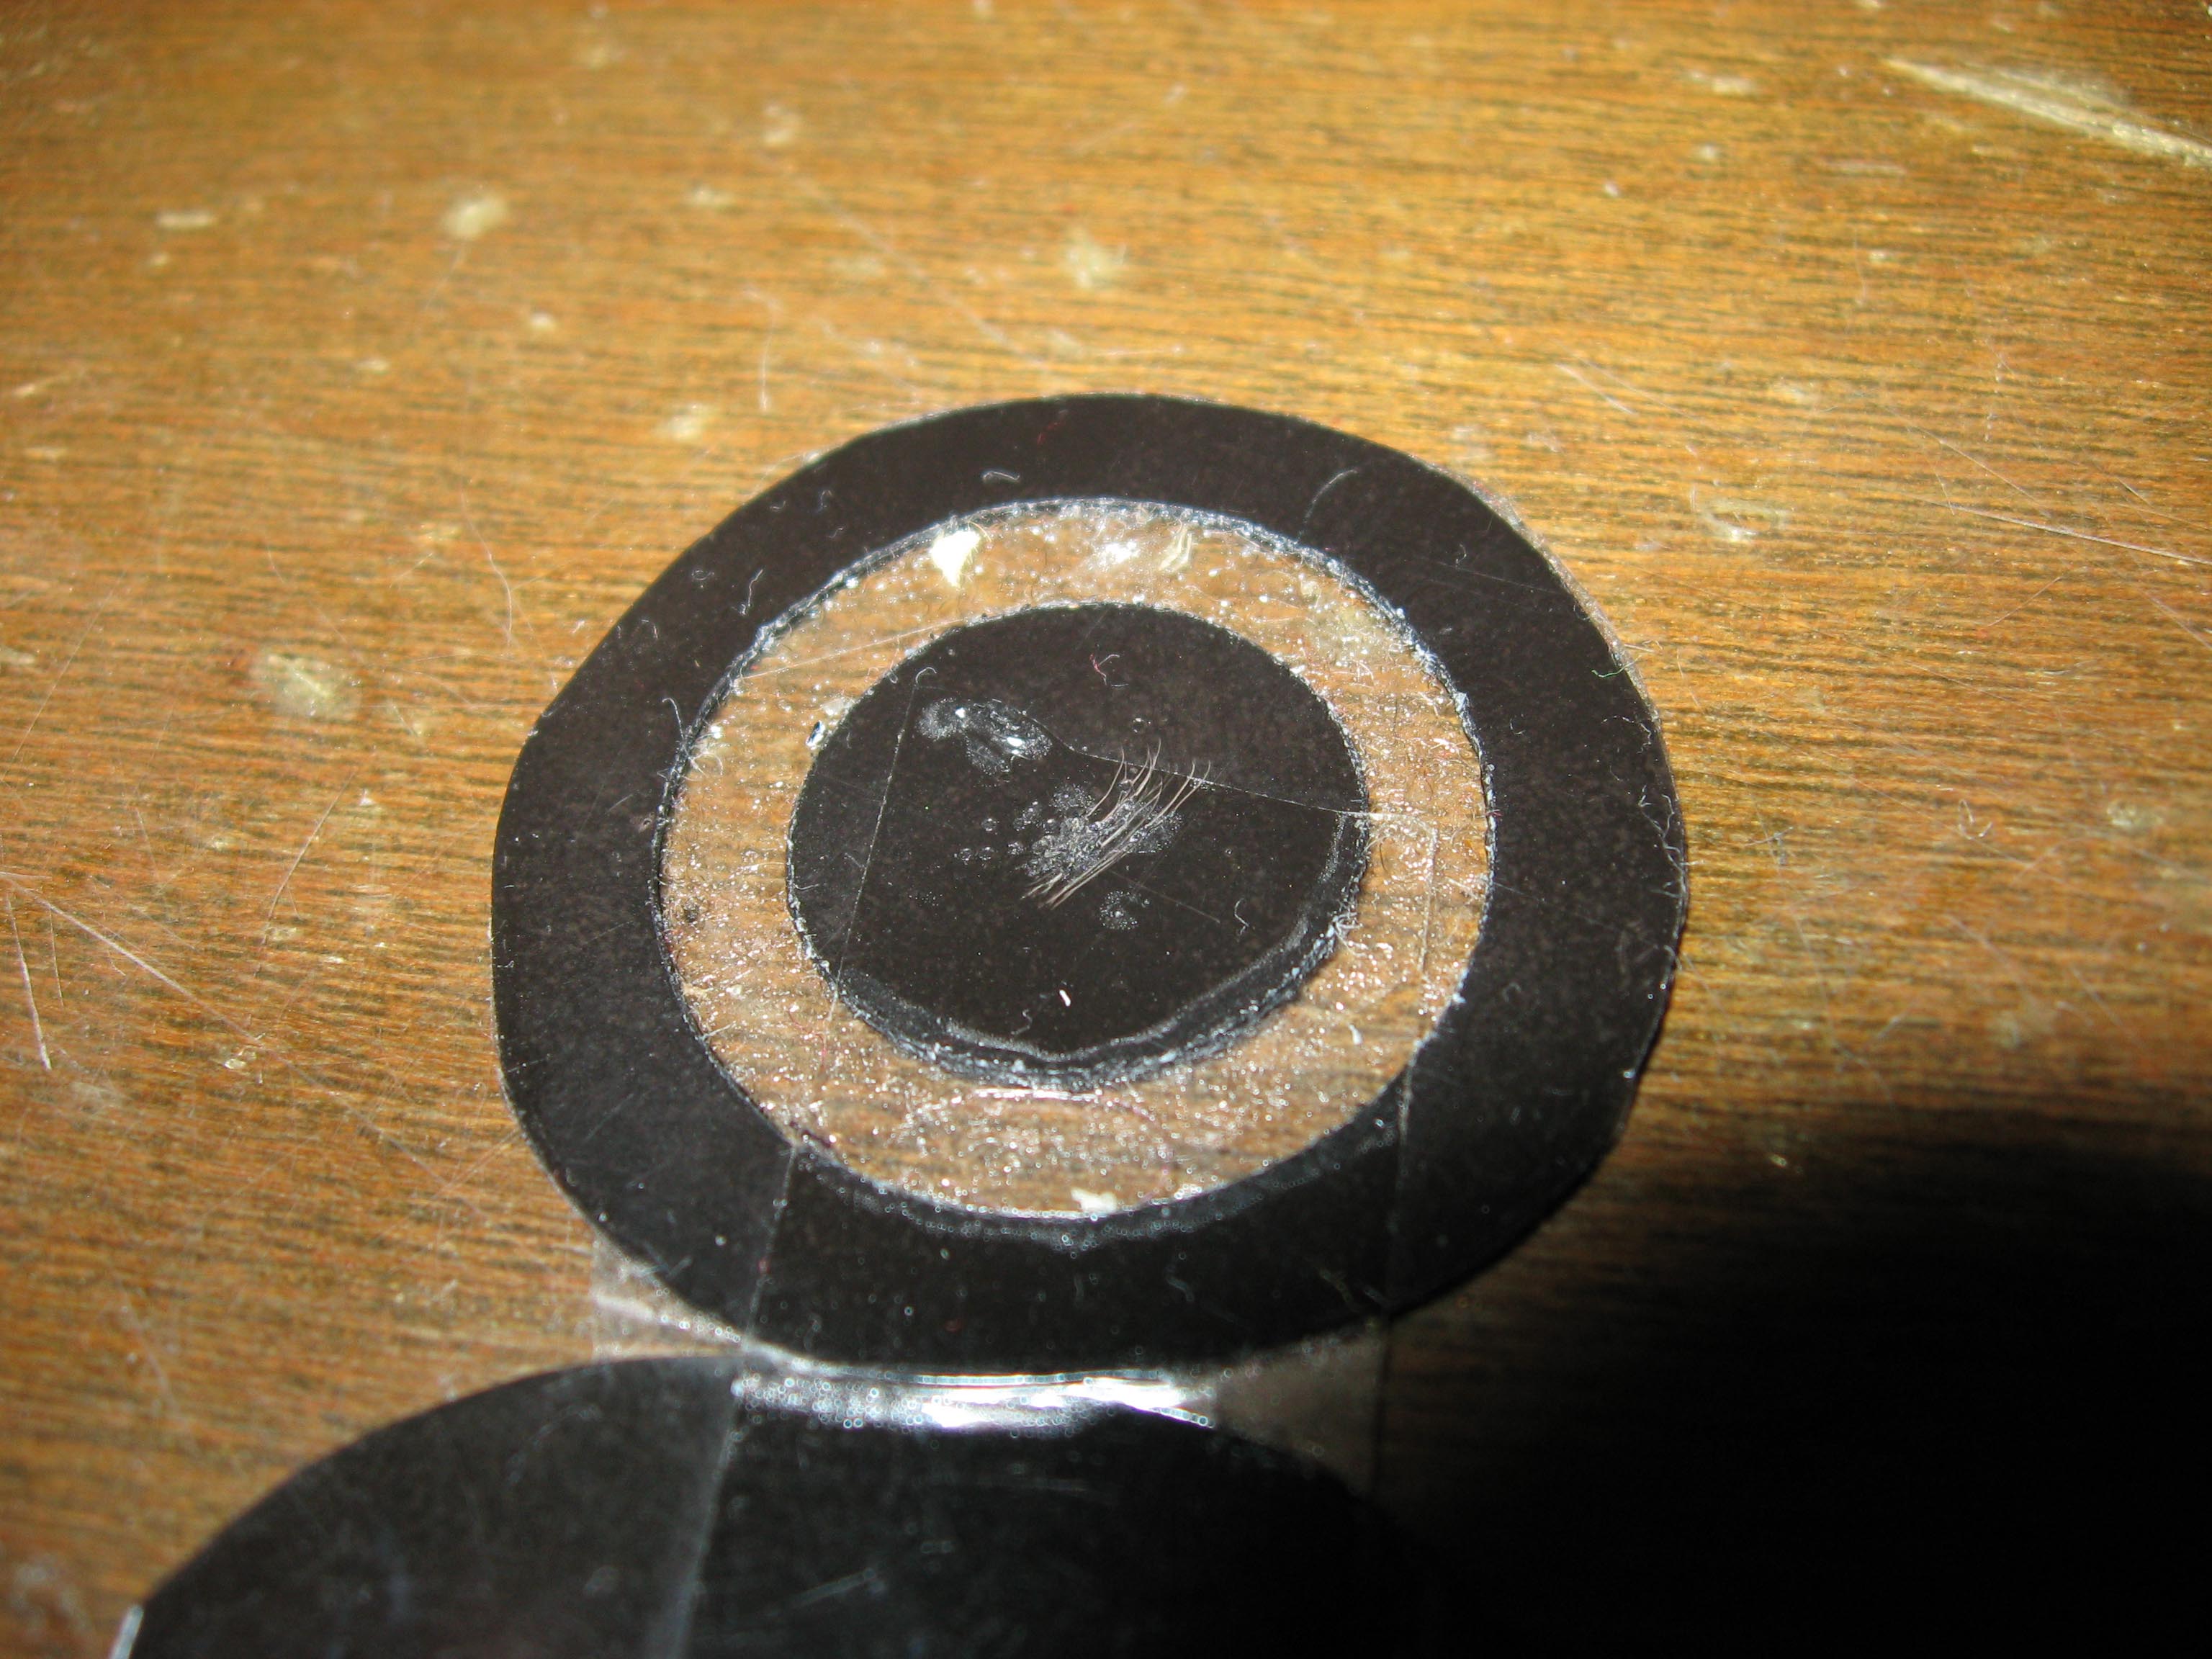
Fig.5: mascherina finale
final filter
…ottenuto questo inseriamo il tutto sotto il condensatore e centriamolo un po magari alzando e abbassando il condensatore stesso!
Questo sistema va benone con obbiettivi a basso e medio ingrandimento, diciamo fino al 25x inoltre, scentrando un po’ il dischetto, permette anche di ottenere una sorta di illuminazione mista con risultati davvero suggestivi.
*****
… gotten this filter, insert it under the condenser and center it until you have a good darkfield.
This system is very good with low and medium magnifications objectives , no more than 25x; therefore, placing off axis the disc you can get a sort of mixed illumination with suggestive results.
Nota: il condensatore acromatico aplanatico A.N.1,40 del Photomicroscope Zeiss permette di arrivare ad usare straordinariamente anche obbiettivi da 40x a secco purchè esso sia immerso in olio!
*****
Note: the achromatic aplanatic condenser A.N.1,40 of the Photomicroscope Zeiss allows me to use 40x dry objective too, but it need immersion oil.
Possiamo anche realizzare dischetti di vario colore, che non devono essere opachi e quindi impenetrabili dalla luce, bensì trasparenti ma dal colore molto molto pieno.
Si può realizzarli sovrapponendo lamine di plastica trasparente colorata (quella che si usava per foderare i libri) o qualcosa di simile..in questo caso lo sfondo non sarà più nero ma prenderà il colore del filtro….ad esempio blu (fig.6)!!
Se ancora , al posto del nastro trasparente che circonda il disco visto in fig.5, ne usiamo uno rosso ,otterremo il campione colorato di rosso su uno sfondo blu…
Ricordarsi che il disco centrale determina il colore dello sfondo mentre l’area attorno ad esso che lascia passare la luce, determina il colore del campione!!
Chi è intressato faccia una ricerca su internet alla voce “illuminazione di Rheinberg”
*****
We can also realize discs of various color, that don’t have to be opaque but transparent but of very dense color.
It can be realized overlapping coloured and transparent plastic sheets, this way the background will take the color of the filter…. for instance blue (fig.6)!!
If you replace the transparent ribbon that surrounds the disc seen in fig.5, for istance with a red one , you will get a colored sample of red on a blue background…
Remember that the central disk determine the color of background while the area around it, that allows to pass the light, will determine the color of the sample!!
Who is very entusiast of this metod ,please take a look to “illumination of Reinbergh” on the web.
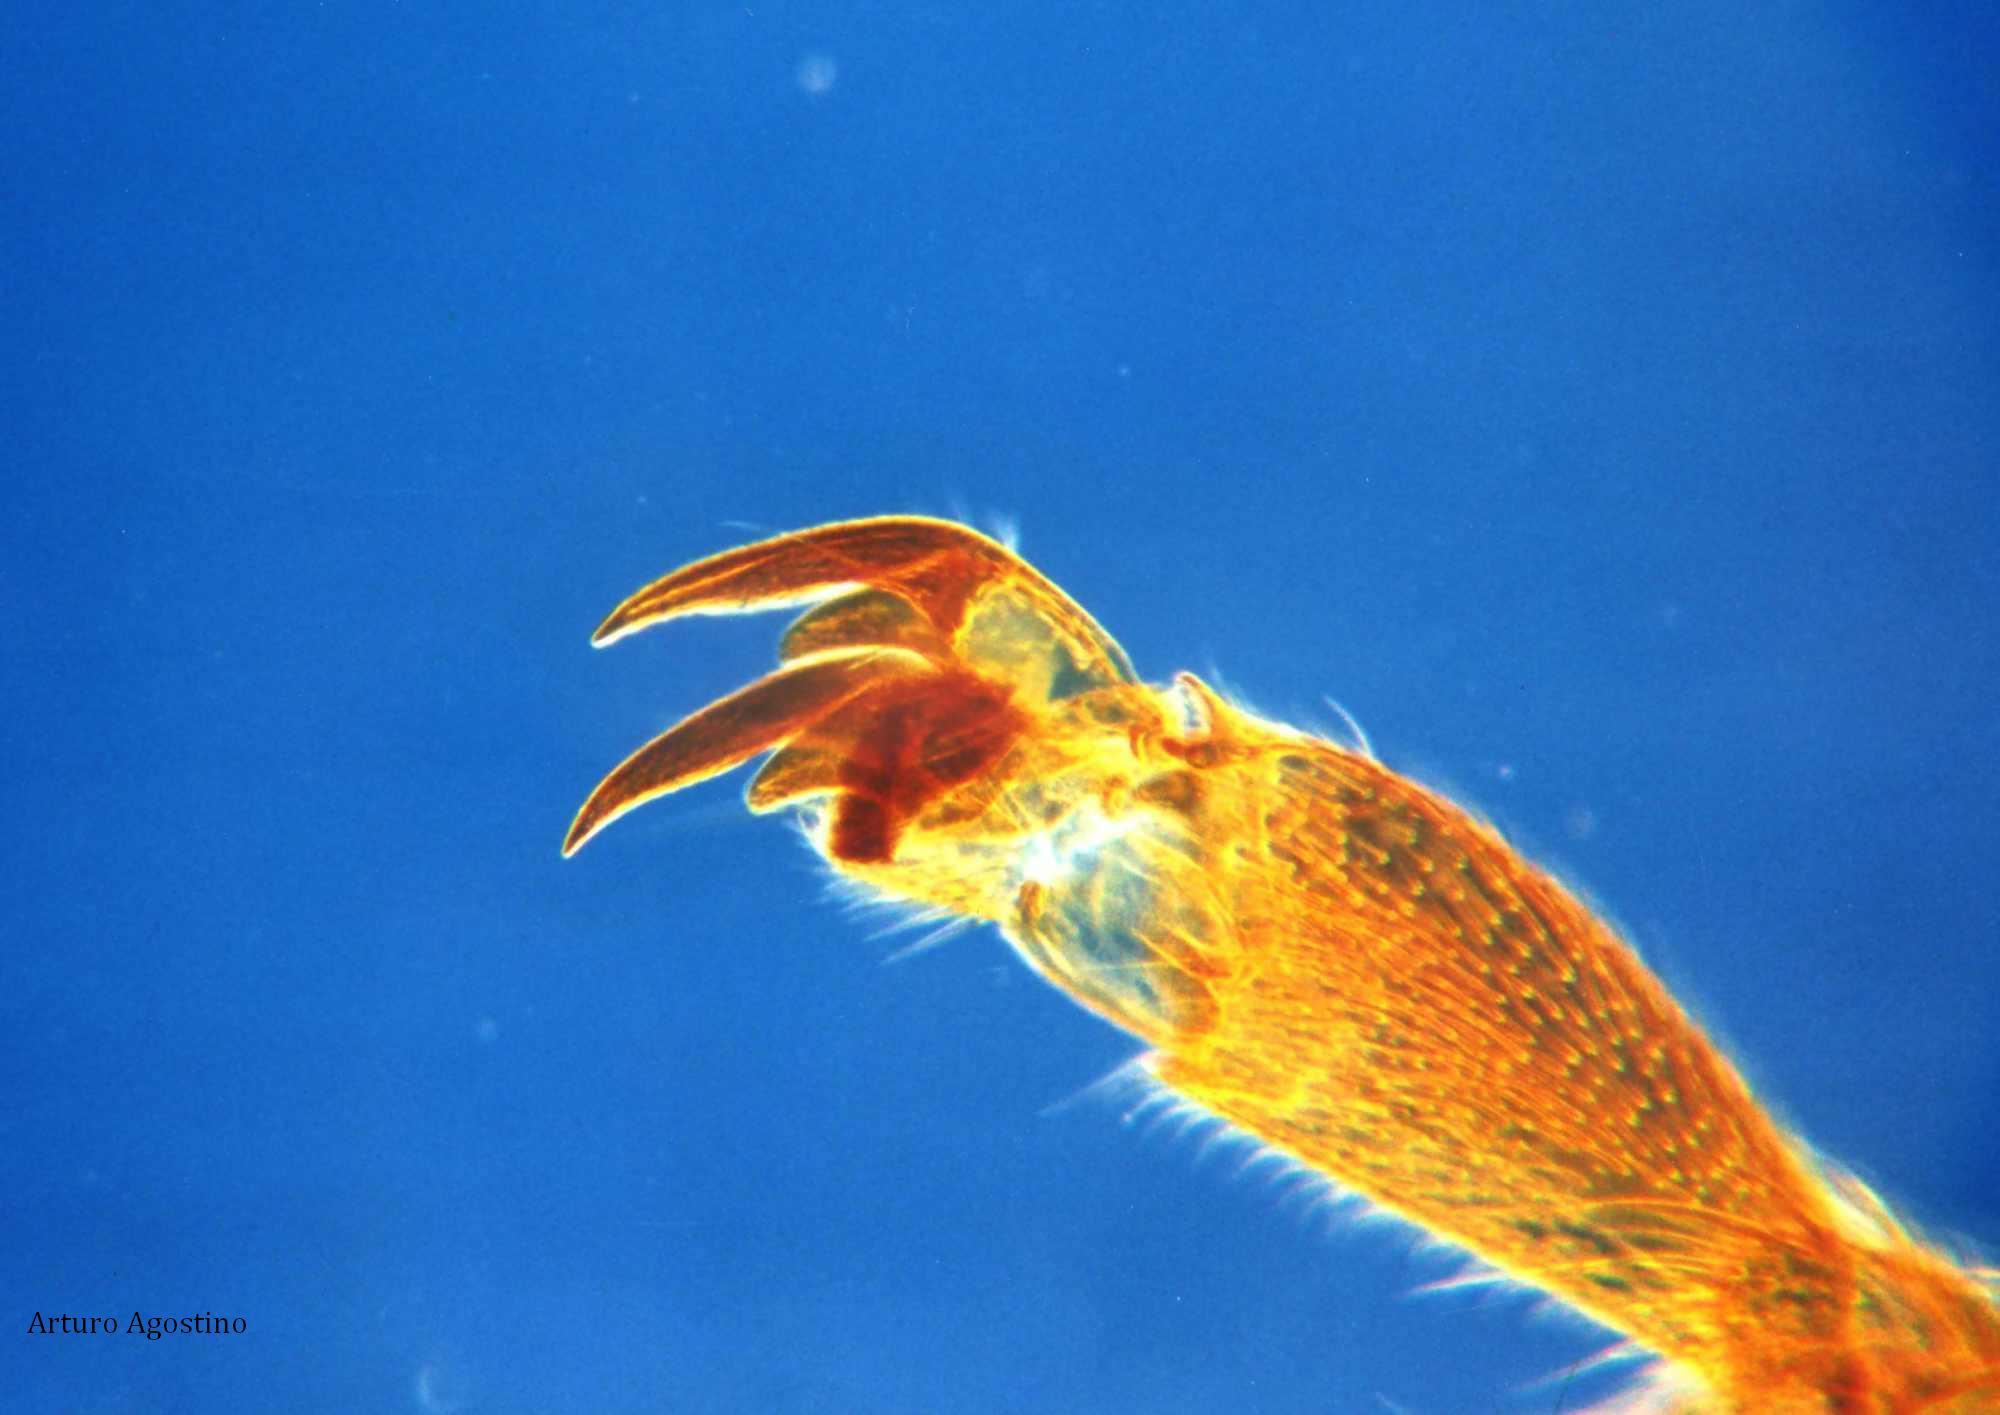
Fig.6: particolare zampa di ape ottenuta con disco centrale blu
leg of bee gotten with bluecentral disc